This card was a complete nightmare—and total pleasure to make.
I wanted to
make an interactive card that was whimsical and included cats, as my partner
loves them.
The
nightmare was in getting it to do what I wanted it to do. I wanted a narrative,
basically, the cat is chasing the heart around the garden, leaping, stalking,
before finally catching it! I guess there’s a lot of symbolism both ways, but I
prefer to see it as ‘you caught my heart’ than the other, more grizzly version!
I spent
hours trying to work out how to show the cat stalking the heart with a reveal,
which then turned into the cat having the heart in their mouth…without the card
being three feet long! To make the cats big enough to be seen, it meant the
stalking cat was really looooong as they did their thing. I was losing my mind
before finally coming up with the solution below.
To give
myself a place to start, I cut out two cats on sticks.

These were
to be the “chasing” cats.

I cut out a
piece of card to give me an idea of how much space they would need.

I needed
just enough length on the stick so there would be a handle to move them, and
room in the card for the cat to disappear completely.

Trying to
get the mechanism for the front cats was more difficult, and took many attempts
to get right. Using scrap card I had to try to work out how to show one cat,
and hide the other.


But they
all ended up with a card that was too long. Layering up wasn’t working, so
instead I realized I had to stack the cats on top of each other. This made for
a taller card, but it was something I could cut out.
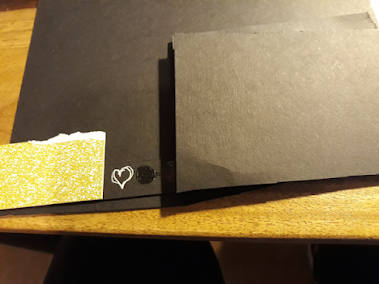
I started with plain black to provide structure, and because it’s cheaper than coloured card.

For this
card, most of the designing was done in Canvas workspace, I layered up the
pieces in the worksheet so I knew they would fit together.

I still had
only the slightest idea on how this card would hang together, to I did a dry
run first.
Above are
the sliding layers of the card laid out.
This is how
they were put together:
The first
layer has the stalking cat. Note that he’s on a green background, and that there
is another black layer on top. This is to stop the sliding layer from getting
caught on the cat cutout.

Then comes
the slider. Note how is covers the cat, but there is still space for it to disappear
when opened.

On top of that
is the catching cat. He has a layer of black card so he doesn’t get hidden
behind the tab. There is another layer of black to give depth again. There is
still the cutout for the stalking cat, so he shows.

Then comes
the last tab. This was the revelation, that I didn’t need to make the action
move over both cats (although I would have preferred it), I just need to make
sure the tabs crossed.
That way,
as one cat is exposed, the other is hidden.

The final
layer is the front (misaligned so you can see the layers).

To make
sure the tabs ran smoothly, I added a few layers of black card in strips at the
top and bottom. They needed to be narrow enough to be hidden, but wide enough
to make sure the tabs would run along them smoothly. The idea was the tabs
would sit on them, and would avoid snagging together. This was an issue as the
card has a tendency to flex.

As I had
cut a black version of the tabs to make them a little stronger, you can see how
they had bent slightly.

I also
added a stop at the end to prevent the slider from being pushed right through.
This was done on both layers, but in reverse for the stalking cat. The catching
cat layer was stuck on the top of the stalking cat layer using these edges,
making sure that the slider would still work.

I then
moved to the jumping cats. I still had only the slightest idea on how I was
going to put this all together, although I thought at the time I was going to
put it in a box.
I positioned
thick acetate sheet to the back of the cat and heart, and scribed around them.

And then
cut away the excess.

Then glued
in place, adding another cat layer to help hold it in place. This meant the
jumping cats were three layers.
I used
nylon bolts and nuts to hold the cat in place, adding a washer and a nut
between the card and the cat stick, before fixing in place with a final washer
and nut. The cat was then put on this nylon sandwich, with a nut securing it.


You can see
from the pencil marks I was still experimenting with the location of the hole
so the cat would show correctly, and at the right angle.

Because the
cat would just drop to the bottom of the card, I added 3D foam to the resting
point of the stick. I needed it to be low enough to hide the whole cat, but not
so low it would take a lot of movement to get the cat into view.

My first
version was too long! It stopped the cat from showing at all.

So I had to
trim it down.

Then I
needed a stopper to stop the cat from leaping too high, but allow his little
feet to show.
This was a
little too high, you can see the stick.

Perfect!

And this is
what the stopper looked like on the reverse. Again, just 3D foam.

As this is the second jumping cat (closest to the front), I added foam tape to the back so I could attach a blank layer to it. This is the shorter layer with no grass on it, this was done to give the cats some space to jump without getting caught on the grass.

I used the
technique of removing the foam tape backing only part of the way, and making
sure that the tape stuck out. This meant I could have more flexibility in
lining up the layers correctly. It’s also important to make sure the foam tape
doesn’t interfere with the jumping cat action.
I had to punch another hole to give room for the bolt.

I cut down
the bolt:

For the
final touch, I glued on the green grass layer over the front of the black
layer. This is a really short piece of grass, designed to save the expensive
American Crafts card. To make it interesting I did two of each of the short ones in different greens, flipping
one of them over so the grass looked fuller.
I repeated
this for the second jumping cat, with the stick on the other side. I also made
sure that the bolt goes inside the card, so basically the bolt heads are on the
outside. This was then stuck to the back of the first jumping cat.
Just make
sure the grass is forwards, and the cats are the right way around—the acetate
should be as hidden as much as possible!
Finally it
came time to put the sliding and jumping parts together.
During
making the card, I had realized that I didn’t need to make a box to enclose it
all. I just needed to bind it together.
I decided
the best way to do this was nice and subtle. I glued the sliding layers to the
jumping layers, getting them as lined up as possible.
I made a
strip that went along the bottom of the card, and overlapped as much as
possible on the bottom.
You can see
the clear difference in black cards here—the darker one is Linda Chapman’s card
which is great card, but not thick enough for structural work. But here it’s
more a tidying job, so it was perfect.

Using the
Caterpillar Crease, I measured the depth of all the layers as well as I could.

I then shaped
the slim piece of card into a U that covered the base of the card and up the
sides- making sure it did not interfere with the apertures that show the cats.
This has
the advantage of looking neat, but also holds the sliders in place, and gives
them a lovely, smooth surface to run on.

The next
step was to stop the sliders from coming out, and give the layers more
strength.
Whatever
you do, make sure the sliding tabs are in place before you do this step!

I just used
a simple piece of card wrapped around it. Make sure you don’t make it too
tight, or you’ll compress the layers and stop them from working.

Next, I put
on the main layer of green.

With a
final, shorter version of green on top to give a bit more depth.

On the
back, I covered the bolt head up with a layer of black card and foam tape.


The final
product looks like this:

Jump!

JUMP!

Creeping…

Caught!


The side
view is interesting as it shows the layers.

There are
no words on the card—I’m not one for adding them. But you could easily add a
message. And it doesn’t have to be cats, you could use any animal, or occasion.
A dog with a ball, perhaps? You could just have the jumping layers for a bird,
for example.
Despite the
depth of the card being quite shallow, it stands really well. Overall it’s a
great, fun card, even if it was a bit of a nightmare to work out!
I did a quick video of the card working. This was done a while after the card had been in a box, so it wasn't working as smoothly as when I first created it. But you can see how the layers work.
Want to create this card? Become a Patreon! https://www.patreon.com/craftdragon
Comments
Post a Comment